After careful consideration I have decided to transfer all hardware review activities to a new domain. I purchased Hardwareasylum.com in 2012 and have been working hard to build a new and improved Ninjalane on that domain. If you are reading this you have reached one of the archived articles, news, projects and/or reviews that were left behind during the site migration.
Please update your bookmarks and be sure to visit the new and improved Ninjalane at Hardwareasylum.com
Installing an AMD Athlon64 Processor
Author: Dennis Garcia
Published: Monday, July 02, 2007
Heatsink Install
The only thing left is to install the heatsink, We’ll be using the OEM unit so keep in mind that your installation procedure may vary. (For instance some install to the motherboard, some don’t have lever locks, and others screw into place, etc…)
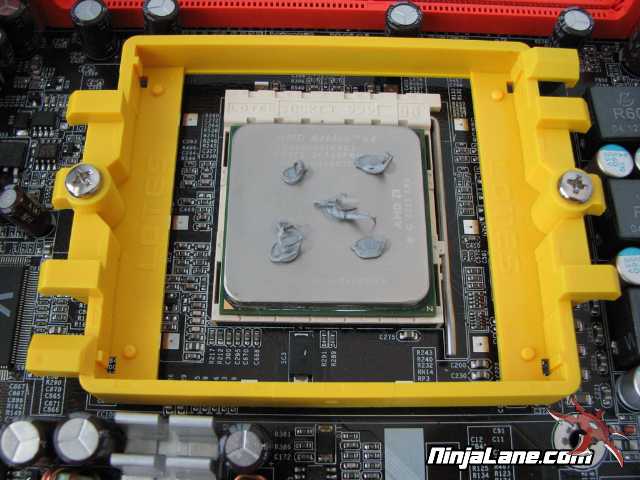
First apply some thermal paste to the processor. We won’t go into the different methods to installing paste but keep in mind that even coverage is important and too much can be bad (along with having too little). A tried and true method we use here in the Ninjalane Labs includes 5 small dabs of paste in the following pattern. When the heatsink is installed the dabs will even out to cover the entire processor. Single dabs in the center also work but we’ve discovered that you do not get even coverage this way.
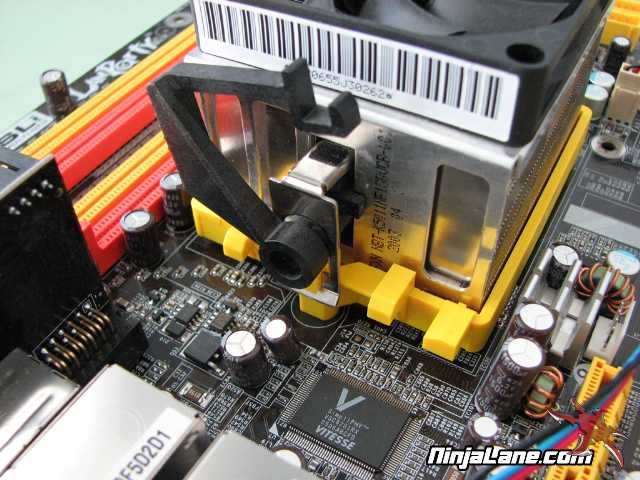
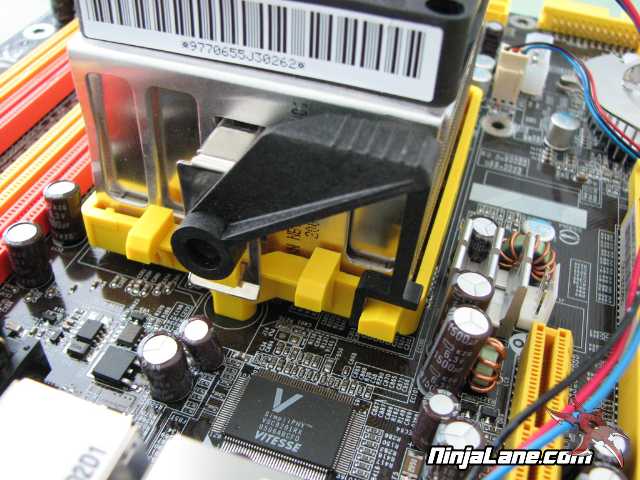
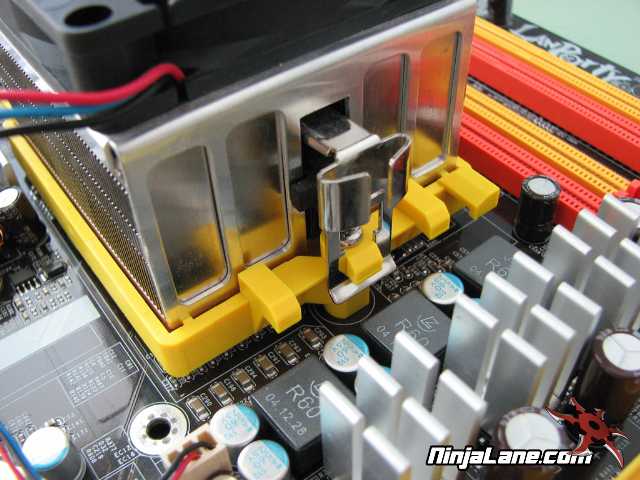
The OEM heatsink installs quite simply, first attach the tabs to each side of the mounting plate, using a screw driver can help for this. Next swing the black lever clockwise until it clips to the mounting plate.
Connect the fan and you’re done.
We hope this quick guide helped you understand the proper method for installing a processor, while this was written as a step by step guide keep in mind that while the methods are similar not all processors install the same way. Consult this site and your included documentation for further information.
Thank you and happy system building.